Though today was the Ascension of the Lord, [Gillian] did not end up doing an acitivity based around that. As I was looking for crafts to do for this Sunday, I decided I should probably scrounge through the list of crafts/activities from years past. It turns out that we had already done the activities I had been looking at! (See archive)
No worries. The Ascension of our Lord just so happened to line up with Mother's Day this year. AND it was all happening in the month of May, the month of Mary.
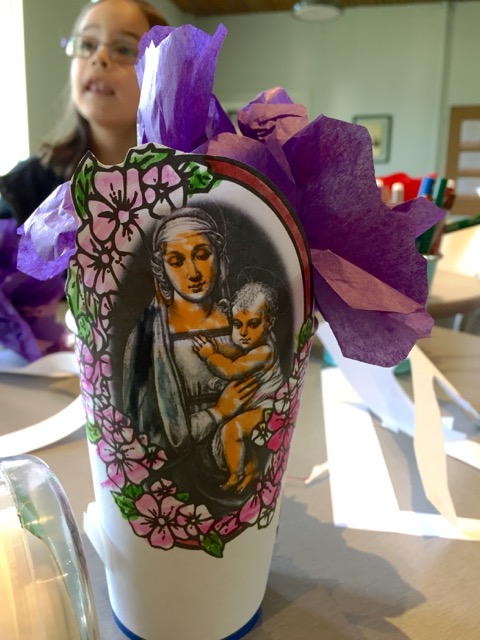
This is what the craft ended up looking like:
No worries. The Ascension of our Lord just so happened to line up with Mother's Day this year. AND it was all happening in the month of May, the month of Mary.
This is what the craft ended up looking like:
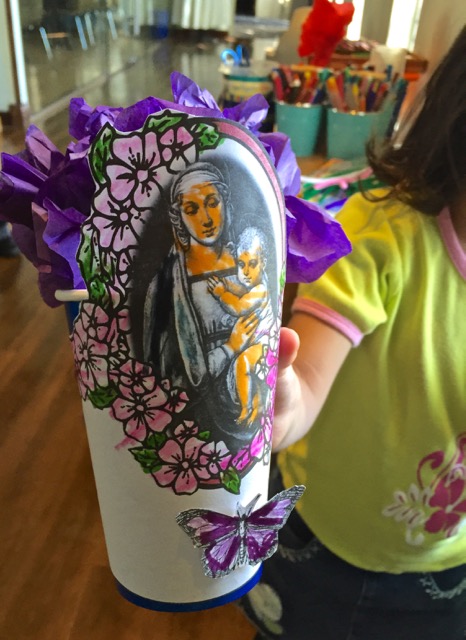
Personally, I was delighted with the results!
Preparation
I began by printing the colouring template from this website. It was a weird process to actually download the template, as it looks like you are about to go through a credit card purchase, but it ends up being some weird default; the product is free, and you do not have give any personal information to the website.
If you are feeling especially inspired, or have innumerous amounts of time :), you can go ahead and follow the full set of instructions from the original website. Due to only having about 25-30 minutes of children's liturgy, I omitted making the grass and paper flowers. The main picture of Mary and the baby Jesus was detailed enough that I knew the kids would hardly have enough time to finish the one colouring page, let alone a dozen flowers.
Instead of paper flowers, while the kids coloured, a couple of the parents and I made tissue paper flowers that the children could put in their finished vase and give to their mum. This worked out well timingwise, and I think it was also a good choice because the instructions for making the flowers (see below) may have been a bit lengthy and complex for the kids.
Supplies
- plastic cups
- colouring page template
- crayons, pencil crayons, markers, etc.
- scissors
- tape or a stapler
- tissue paper
- pipe cleaners
Instructions
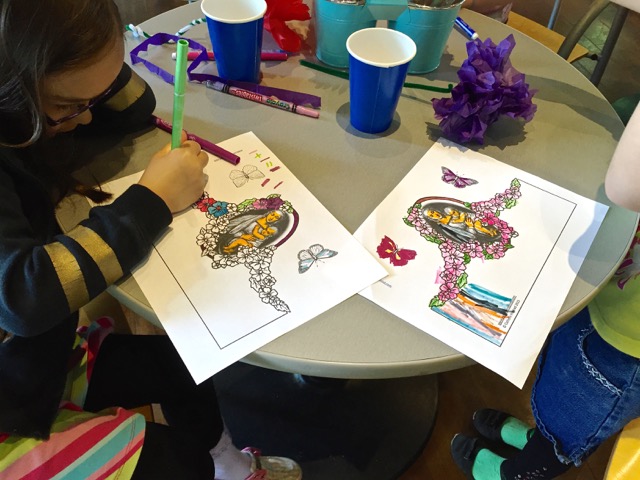
To make the vase: Simply have the kids colour the picture to their heart's content. I also encouraged the kids
to write a nice message to their mum in the blank space provided on the template. When they are all done colouring, simply cut out the picture, as well as the butterflies. Wrap the picture around a plastic cup, and either staple it directly to the cup, or tape the paper to itself and to the cup at both the top and bottom of the template. NOTE: the template overlapped a little bit because the cups were smaller at the base than the rim. If your kids want to write something in the blank space, try to have them avoid writing or drawing at the very edges of it.
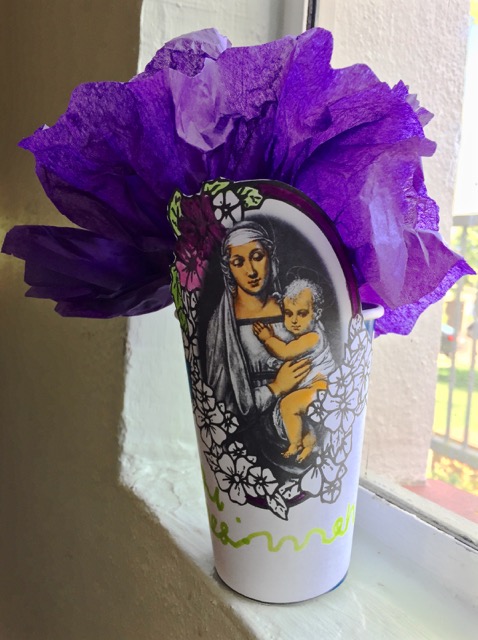
Voila! The vase is all finished.
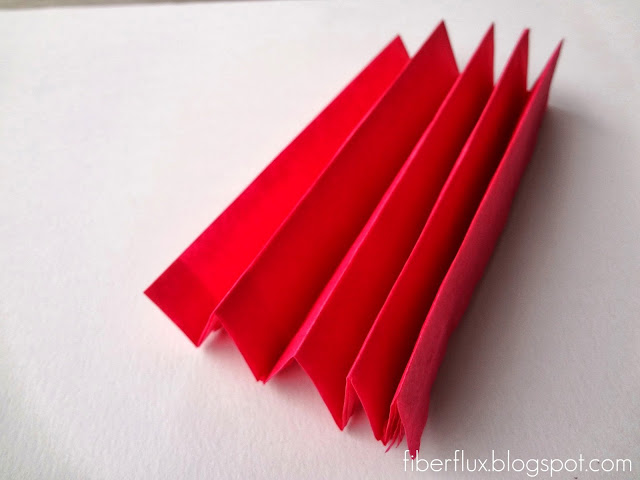
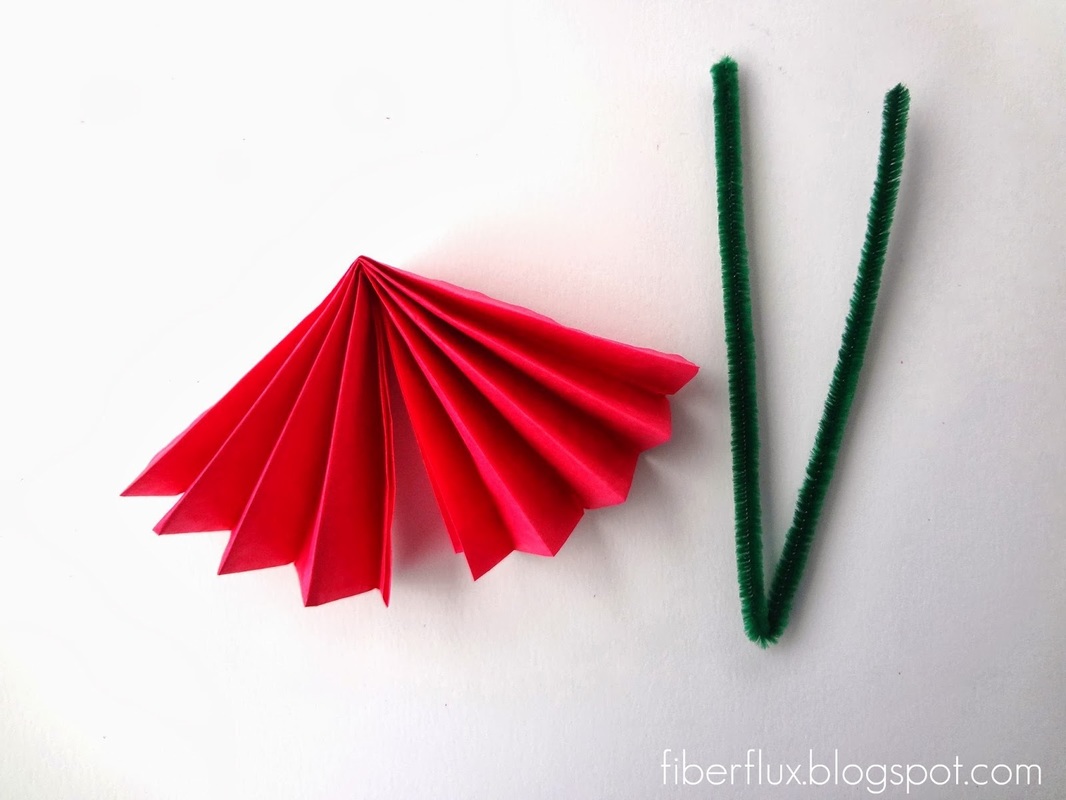
To make the flowers: Use one to two pieces of tissue paper per flower. Layer the two pieces on top of each other and fold them in half. Additionally you can fold them in half again if you want a smaller flower. Starting at one end (it doesn't matter which one), accordian fold the tissue paper. You should end up with something looking like this:
to write a nice message to their mum in the blank space provided on the template. When they are all done colouring, simply cut out the picture, as well as the butterflies. Wrap the picture around a plastic cup, and either staple it directly to the cup, or tape the paper to itself and to the cup at both the top and bottom of the template. NOTE: the template overlapped a little bit because the cups were smaller at the base than the rim. If your kids want to write something in the blank space, try to have them avoid writing or drawing at the very edges of it.
Voila! The vase is all finished.
To make the flowers: Use one to two pieces of tissue paper per flower. Layer the two pieces on top of each other and fold them in half. Additionally you can fold them in half again if you want a smaller flower. Starting at one end (it doesn't matter which one), accordian fold the tissue paper. You should end up with something looking like this:
Lay the accordian flat on your work surface and fold it in half widthwise so that it looks like this:
Then wrap one end of a pipe cleaner around the pinched middle and twist it so that the flower won't fall off the pipe cleaner. Before you can make the flower really look like a flower you have to trim the top of the flower using any sort of pattern you want (see below).
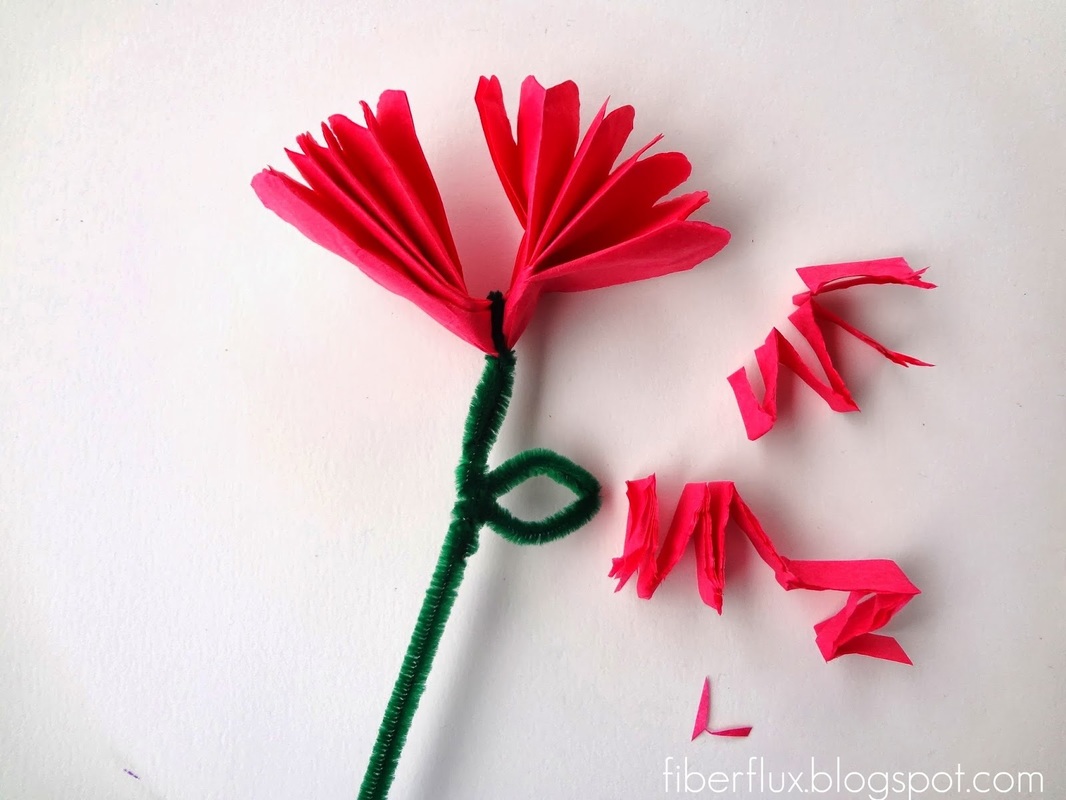
Now simply fluff open the tissue paper. I found that the more randomly I fluffed it, the more realistic it looked, probably because the tissue paper stayed more crumpled.
The last thing we ended up doing was twisting the base of the pipe cleaner stem to give it a base. The flowers were a bit tall and top heavy for the cup vases, so forming a base allowed them to stand up in the cup.
The last thing we ended up doing was twisting the base of the pipe cleaner stem to give it a base. The flowers were a bit tall and top heavy for the cup vases, so forming a base allowed them to stand up in the cup.
Reflections
One thing that I was happy I did not omit was the butterflies! Initially, before printing the colouring template, I had attempted to remove the butterfly cutouts, as I thought they would be too finicky for the kids. Turns out they loved them! The butterflies also looked great on the finished products, and the kids liked the option of either taping them to the cup or stapling/taping them to the flowers. I thought the butterflies really added some extra charm to the finished vases.
I am really happy with how this activity turned out. Some chance probably helped to make it a success: there were only four kids in the children's liturgy, which means that the helpers only had to make four tissue paper flowers, not eight or ten. In terms of time, the kids didn't quite finish colouring the template, but I think it's okay because there were a lot of little flowers and small things to colour (i.e. it was a time consuming colouring page). The left over white spaces didn't detract from the finished product.
I will for sure be filing this activity away for next May. :)
Until next week,
Gillian
 RSS Feed
